Knitting for Beginners – How to Cast Off, Knit, and Purl Tutorial
 Learning the art of knitting for beginners looks harder than it actually is. Broken down into a series of repetitive movements, it’s surprising just how quick and easy it is to learn, start, and finish a project.
Knitting isn’t just something your grandparents did to save money. It’s a pleasant pastime that has proven to relieve anxiety, depression, and loneliness. It lowers blood pressure by relieving built-up stress. Arthritis and tendonitis can be kept at bay because it keeps finger joints flexible and strengthens hand muscles. It even delays the progression of dementia.
But how do you figure out the complexities of using two long needles to wrap, pull, and loop a piece of string until it morphs into an elegantly finished piece? Believe it or not, it’s much simpler to learn how to knit than you think.
Because knitting requires long chains of repetitive stitches, it’s quick to master the various movements to create them. Learning how to create different types of knitting stitches such as the knit and purl stitch can be done quickly.
Once you realize how fun knitting can be, you’ll wonder why you didn’t learn it sooner.
Knitting for Beginners – Basic Steps of Knitting
The process of knitting can be broken down into five steps:
-
slip knot
-
cast on
-
knit stitch
-
purl stitch
-
cast off
These five steps will simplify the process of knitting for beginners. Learn and practice each of these techniques, and you’ll be knitting full-sized blankets in no time. When your fingers become comfortable with the repetition, you can work faster with less thought.
Beginners only need the basic tools for a very simple project. Don’t waste money on tons of supplies. A set of knitting needles, a ball of yarn, scissors, and a beginner pattern is all you need.
 Wool yarn used to be the norm, but not anymore. Since it’s harvested from sheep and other animals, it’s not an animal-friendly resource. Synthetic yarn options are available in every color and softness level imaginable.
Needles come in different varieties as well, such as bamboo, aluminum, plastic, wood, and more. Plastic isn’t a sustainable resource and creates a slippery surface. Aluminum needles will eventually corrode. Eco-friendly bamboo and wooden needles a better choice. They’re common and inexpensive. They also hold the yarn better to give you more control.
Different Types of Knitting Stitches
Slip Knot
For the purpose of this tutorial, it’s assumed that you’re a beginner who knows the basic stitches. You should know how to make a slip knot since it’s the very first stitch you’ll make for any project. It’s the initial foundation of a knitting starting knot. It’s essentially the anchor that holds all the other stitches in place.
Cast-on
A cast-on stitch is the step immediately following the creation of the slip knot. It creates the loops on the knitting needle. Cast-on stitches are important because they create the foundation row of stitches.
There are multiple methods of casting-on. Single cast-on (easiest to learn), long tail cast-on (faster but harder to learn), and knitted cast-on are a few of the most common. They are all similar, but differ slightly depending on the type of project you have.
After you cast-on, you can choose to use the knit stitch followed by the purl stitch. Knit and purl stitches are what create the pattern of your project. Alternating entire rows of knit and purl stitches create what’s known as the stockinet stitch.
Casting-on with Two Needles
When a pattern calls for you to “cast on loosely”, that’s when casting on with two needles give the best results. Turtle necks and sock cuffs should be cast-on loosely so they are stretchy enough to slip over large body parts and shrink back to their smaller size. Practice this after you’ve learned the regular cast-on method.
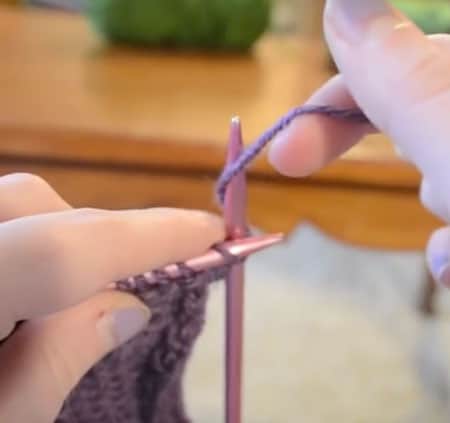
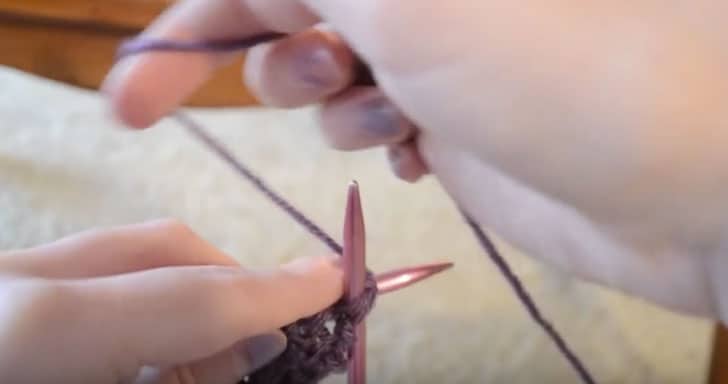
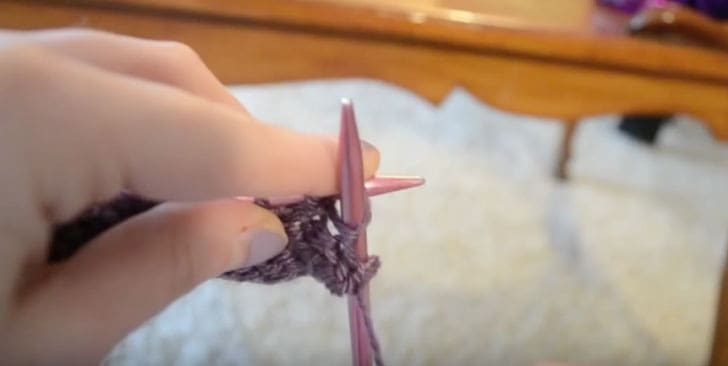
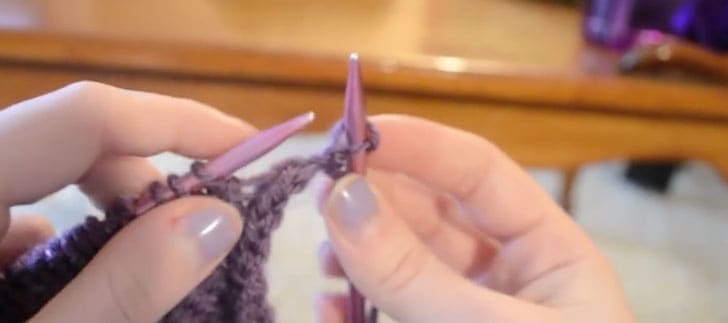
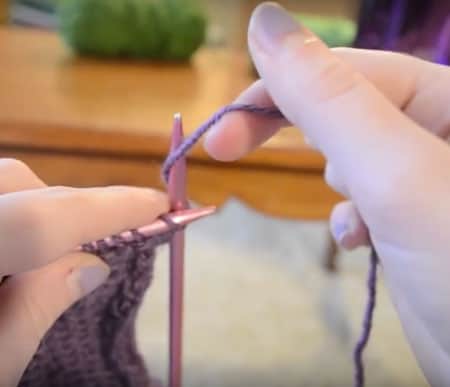
Creating a Knit Stitch
A knit stitch is what makes all other stitches possible. Before you begin this, you’ll need to have already created your necessary cast-on stitches.
Hold the needle with the cast-on stitches in your left hand.
Insert the right knitting needle into the first cast-on loop from behind. 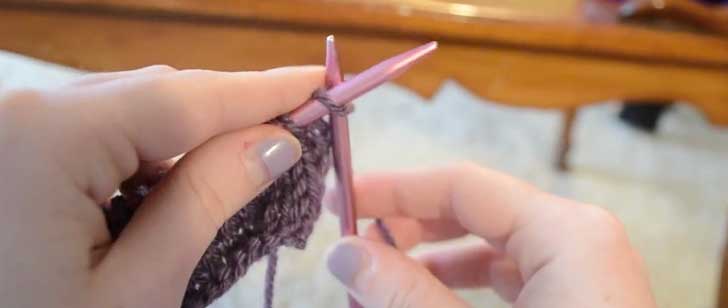 Wrap the working yarn counterclockwise around the needle in your right hand so it sits between both needle tips.
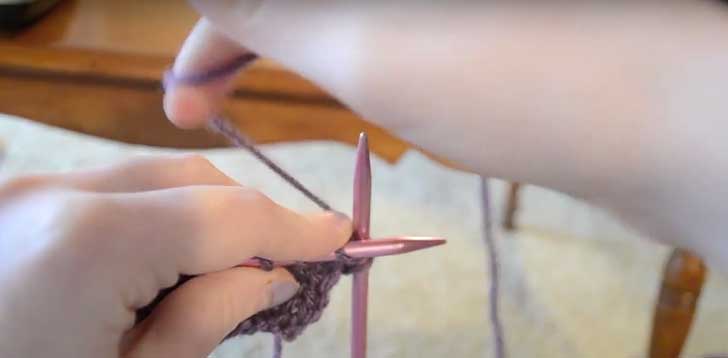
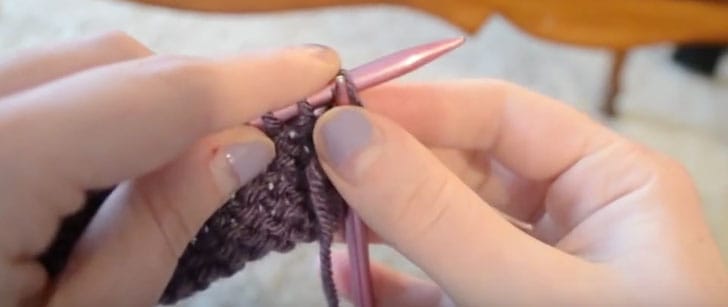
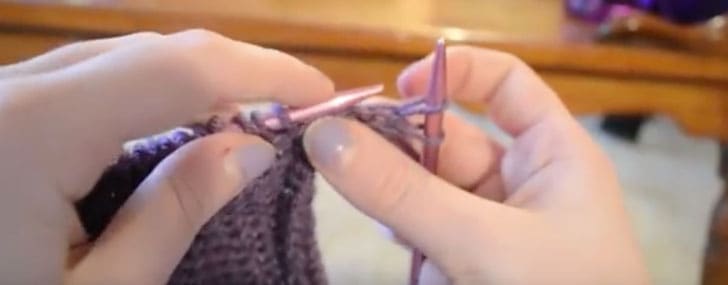
Push the right needle through the loop from front to back. 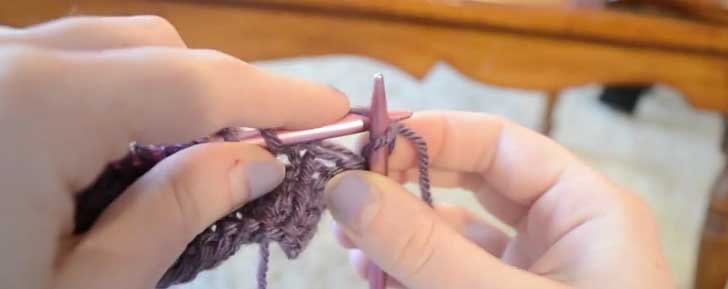
Bring the right needle through the first cast-on loop on the left needle. This will form the knit stitch. Pull the knit stitch through the loop on the left knitting needle slowly until the left needle is completely out of the loop. 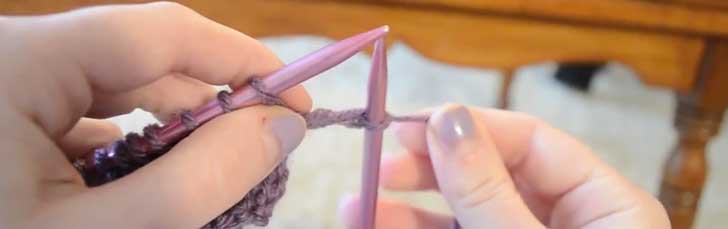
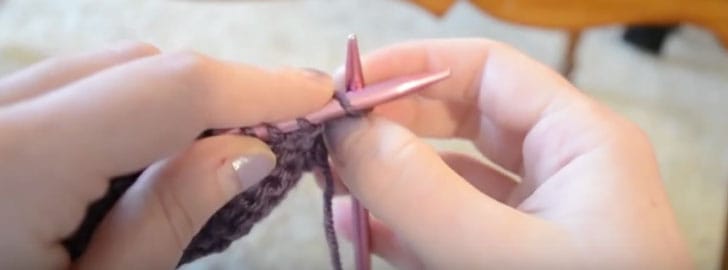
Master the knit stitch, and then you can move on to the purl stitch.
Here is the full video by Derby M of how to create a knit stitch
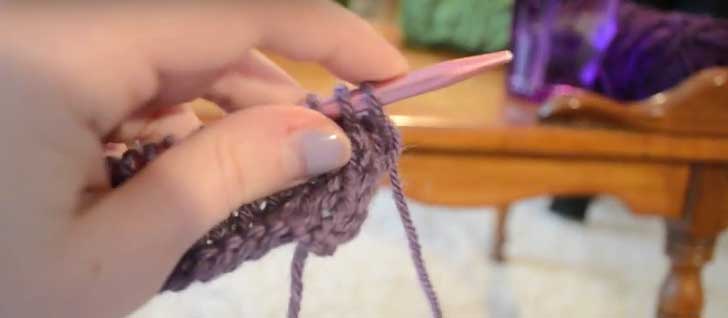
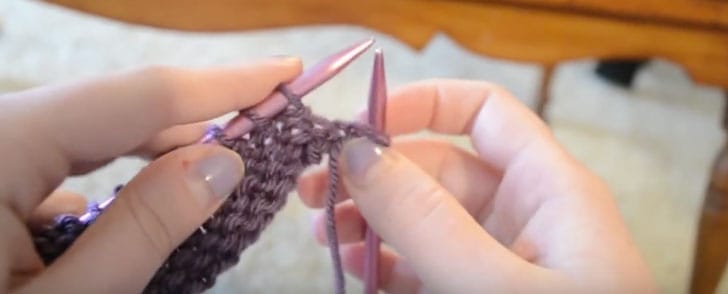
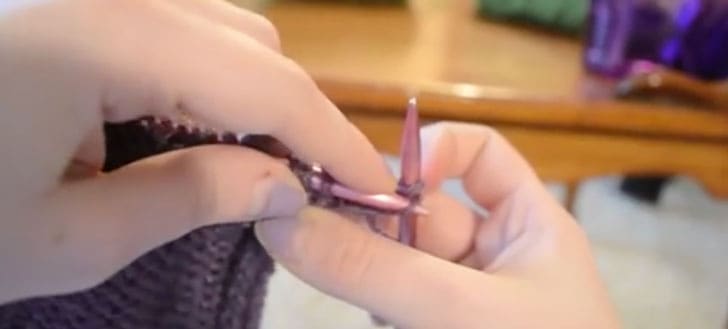
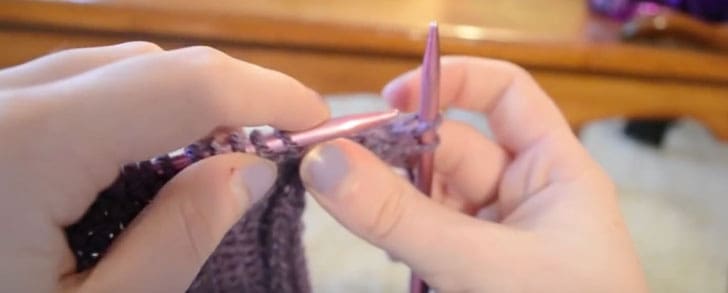
A purl stitch is the opposite of the knit stitch. Keep the right needle in front of the left. Instead of holding the yarn behind the needle, purling requires you to hold it in front. When you begin purling, make sure to keep the working yarn dangling from in front of the right needle.
Push the right needle into the first loop of the left needle. The left needle should be behind the right. Keep the right needle in front of the left, with the working yarn in front of the right needle. (Knitting for beginners: How to Purl 1:23)
In a counterclockwise motion, wrap the working yarn (dangling from in front of the right needle) around the tip of the right needle. The right needle should be in front of the left needle with the yarn between the two.
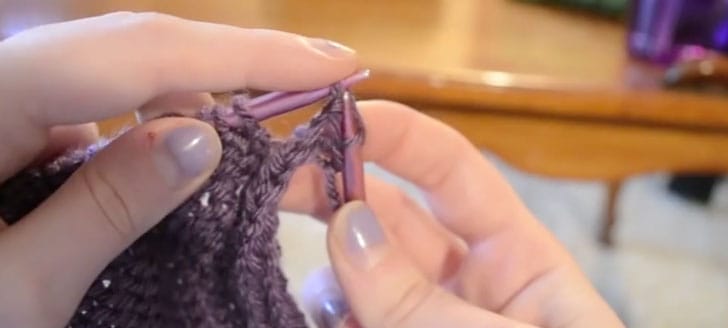
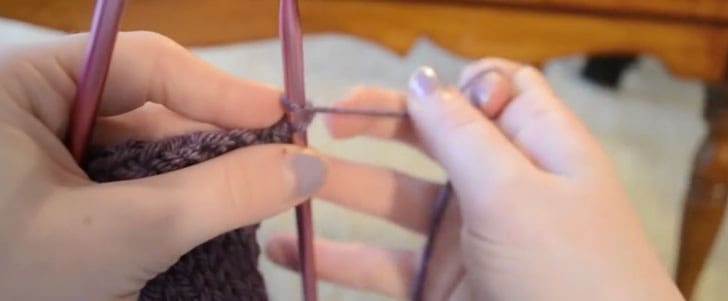
With your thumb on the tip of the right needle, gently slide the right needle back down through the first loop of the left needle.
Slowly bring the right needle up and behind the left needle.
Slide the left needle out of the loop. The new purl stitch should be on the right needle.
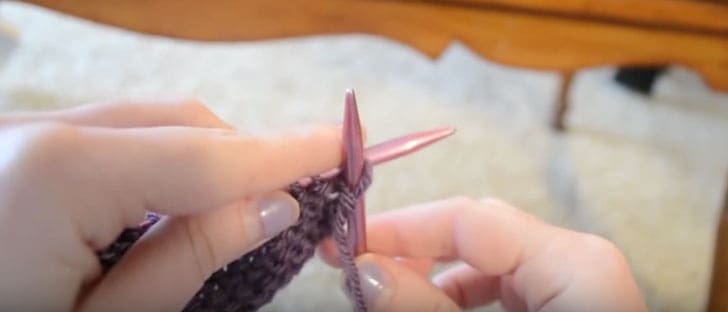
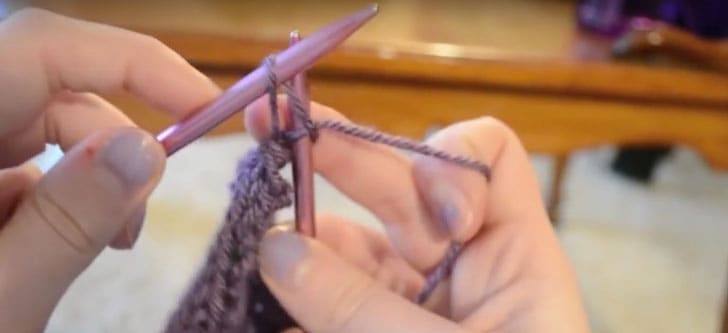
Bringing the right needle in front of the left, push it through the next loop.
Repeat with next loop.
Here is the full video by Derby M of how to create a purl stitch
Casting off
When you’ve finished knitting, how to cast off is the next step to learn. Casting off is the opposite of creating a cast on stitch. It’s important to know how to cast off knitting projects so they don’t unravel. You need to cast off the last row of stitches to create a secure edge that finalizes the project.
Create two knit stitches on the right needle. The right needle should now have two loops on it. (Knitting for beginners: How to cast off 0:59)
Slide the left needle into the first (bottom) loop of the right needle. The left needle should be in front of the right.
With the left needle, pull the first loop over top of the second loop, using your index finger to hold the second loop onto the right needle.
Let it go. Now the right needle has only one stitch on it.
 Knit another stitch onto the right needle. Now there are two loops on the right needle again.
Repeat this with each loop on the left needle. The left needle should now be empty.
When one stitch remains on the right needle, wrap the working yarn counterclockwise around the right needle.
Slide the left needle through the new loop, and slip it over the tip of the right needle.
Pull the stitch to tighten it.

Snip off the remaining working yarn. This creates a final knot that prevents the chains from coming undone.
Here is the full video by Derby M of casting off
 Knitting for beginners – mastering the basics
Once you master the knit and purl stiches, you can knit almost anything. These are the two most common stitches and can be used in thousands of projects. Knit and purl patterns are perfect tools to introduce knitting for beginners who want to create simple and quick projects.
Combine them to create scarfs, cowls, cinch head wraps, baby blankets, hats, baby bibs, mittens, fingerless gloves, dish cloths, shawls, and much more. You could even make a homemade knit and purl stitch cup warmer.
If you would like to see the various grades of yarn, textiles and yarn labelling there is an excellent article on the Martha Stewart web site that comprehensively details the technical detail you need to know when selecting yarn for you knitting projects. See the article ‘Chosing Knitting Yarn’ here…
Once you conquer the learning curve of the different types of knitting stitches, you can make more intricate and details projects. Your fingers will develop muscle memory and give your mind a break. It may seem confusing at first, but keep practicing each step individually until you can combine it with the next. You’ll be more comfortable with each movement and begin to love your new hobby.
If you want to learn the basics of knitting there are some excellent guide books to show you the basics and beyond.
Get to grips with the mysteries of knitting and develop this into a fantastic hobby or even make money from this craft.
I review 5 Top Rated Knitting books here…