Love to Crochet ? – Crochet for Beginners
 Learn how to crochet for beginners!
If you would love to crochet but have never found out how, this mini tutorial will give you a great start.
You never know how good you could be. A crochet master or crochet queen of the crochet world!
What is Crochet?
 Crocheting falls under the craft umbrella of needlework. It’s creating something out of fibrous material such as yarn, twine, or thread by using long stick with a notch at its tip to create loops and then connect them to one another in a chain-like pattern.
Basically, you’re making a ton of loops and connecting them together in a pre-determined pattern.
Why should you learn crocheting? Lots of reasons. For instance, it’s a known depression reliever. Repetitive motions have proven to cause the brain to release serotonin which is a natural anti-depressant.
By creating stitch after stitch, the brain starts to relax and release a steady stream of serotonin. Because you’re constantly counting the stitches in the chains, anxiety levels decrease. Counting in time with repetitive hand motions can assist the brain in refocusing nervous energy into a positive outlet. You can be productive while relaxing and enjoying yourself.
A Brief History of Crocheting
Where exactly did the idea of looping yarn together to make a washcloth come from? Well, the term crochet means small hook in French. It was originally used in the 17th century to create intricate designs in lace making.
Peasants utilized it to create functional household items such as bags, blankets, food sacks, and such. Others used it to create fancier items and sell to the rich as a means of extra income. It spread across Europe and after landing in England, who claim to have perfected the methodology by adding grace and style to it, it morphed into what it is today.
Crochet Vs Knitting
There are many similarities between crocheting and knitting. People use the terms interchangeably since both use yarn, require repetitive hand movements, and utilize a needle or hook. But they are completely different.
The main, and sometimes only, crochet tool needed besides yarn is the hook (sometimes referred to as a Shepard’s Hook) which is a stick with a fish-like hook at the end that grabs the yarn and allows it to be pulled and manipulated through other loops. They come in a range of sizes to accommodate different sized stitches. They can be made of wood, metal, and sometimes ivory.
Knitting uses oversized needles with sharp points, and it requires the simultaneous use of two. Crocheting only requires using one hook at a time. The primary difference between the two is that crocheting requires the completion of each stitch before moving on to the next one, while knitting leaves many stitches open at the same time.
.
 Gather Your Supplies
A beginner needs the basic crochet tools, nothing fancy. You need to learn, and become comfortable with, the methodology involved before moving on to smaller more complicated stitches.
A plastic or wooden hook isn’t the best choice because the yarn doesn’t glide over that type of material very well. Bamboo crochet hooks are great if you want a tight stitch because they were made for strong hands and lots of tension. For a beginner, they aren’t the ideal crochet tool.
Beginners need to stick to simple aluminum hooks. A basic I-9 hook is inexpensive, comfortable, and makes bigger stitches. Starting out with larger loops and stitches makes it easier to keep track of where you are in the chain, and it will be easier to backtrack to find a possible mistake.
Crochet hook sets are cost effective, and they usually have hooks that have their number (size) permanently etched into the handle. A nice carrying case is usually included which keeps them organized for you.
 Once you start stitching, you’ll find a comfy way of holding the crochet hook. If you tend to roll the handle as you stitch, try using a hook with a thumb rest. If you tend to split the yarn while stitching, try a hook with a rounder tip to avoid grabbing the individual yarn fibers. If you have difficulty getting the hook inside the next loop, a hook with a pointier tip will fix that.
Yarn comes in a million varieties. Depending on what you’re making, you’ll need a specific type. Beginners should choose a solid color so you can easily focus on the stitches and not the coloring. A worsted weight yarn made from acrylic or wool is best. The ball of yarn will have a label that may indicate this, but if not, look for a number four somewhere on the label. It doesn’t have to be expensive yarn. Remember, you’re practicing. Keep it affordable.
If you are looking for a really good starter kit for crochet see my review article on 5 top rated crochet kits here…
 Getting Started
A crochet tool set is simple for a beginner. A ball of yarn and a crochet hook are all you need. As you gain experience, you can experiment with a variety of sizes of hooks to create a myriad of different types of stitches. As you progress, you’ll find that different types of stitches are used to create different types of projects. The more stitches you learn to do, the more things you can create.
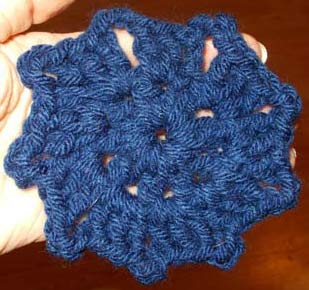
As a beginner, focus on learning the slipknot, single stitch chain, and double stitch. Double stitches work well to create washcloths and similar items because the yarn soaks up the water, but the holes allow for the water to flow through it. Most first-time projects require these three basic stitches. Master these before moving on to more advanced techniques such as half double stitches and triple stitches.
The Basics
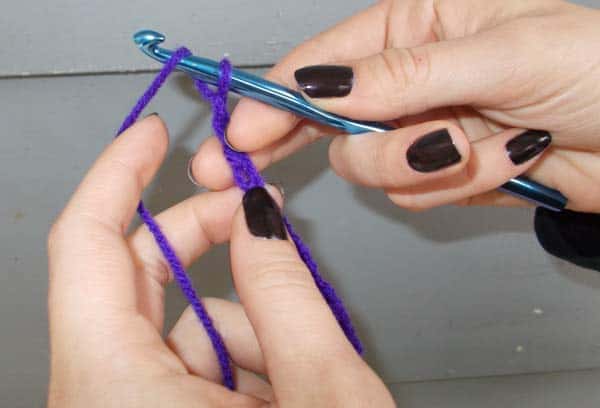
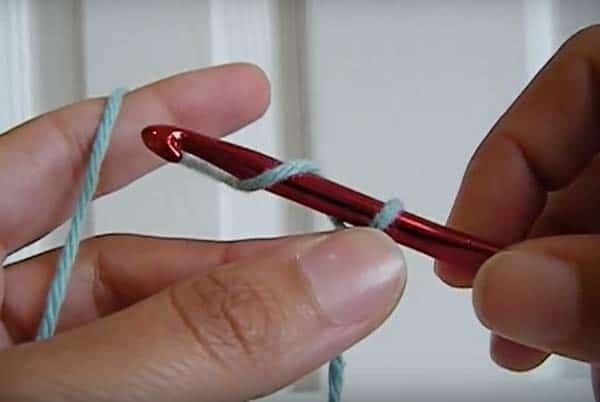
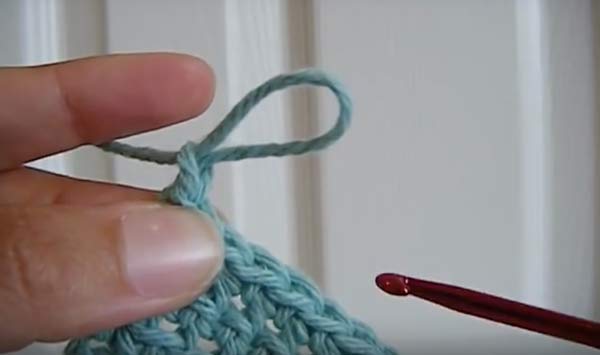
Once you have a crochet hook and yarn, you’re ready to get started. The first step is to create a foundation chain which begins with the creation of a slipknot. At the beginning of the skein of yarn, you’ll need to make a loop that can fit around your thumb with some excess wiggle room. Make a loop, then make a second loop and insert it into the first one, and pull.
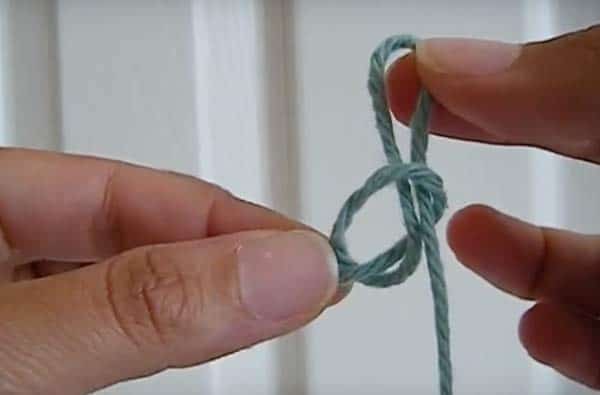
This results in a single loop with a knot at the end which is known as the slipknot.
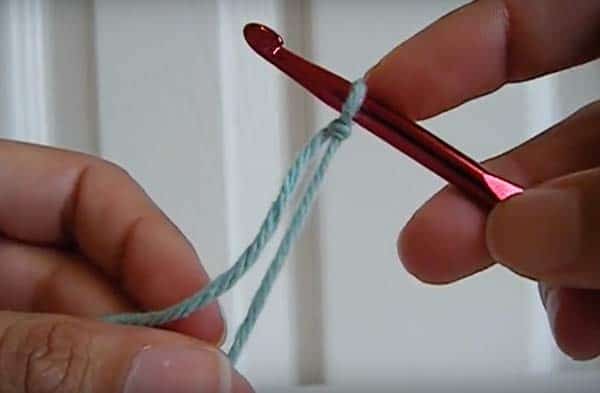
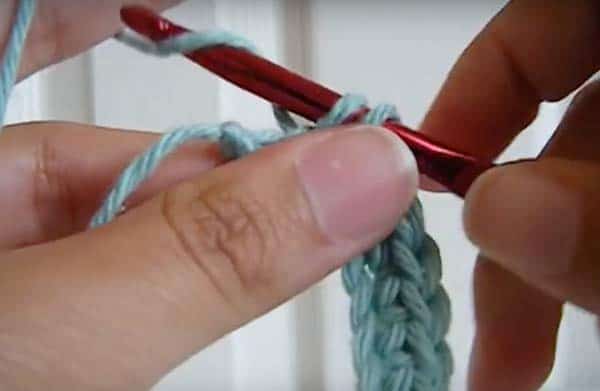
The slipknot is the foundation for creating a chain, and probably the easiest part of getting started. To start the foundation chain, slide the hook through the slipknot. Tighten it so the hook won’t slip out, but leave it loose enough that it can slide up and down the handle of the crochet hook.
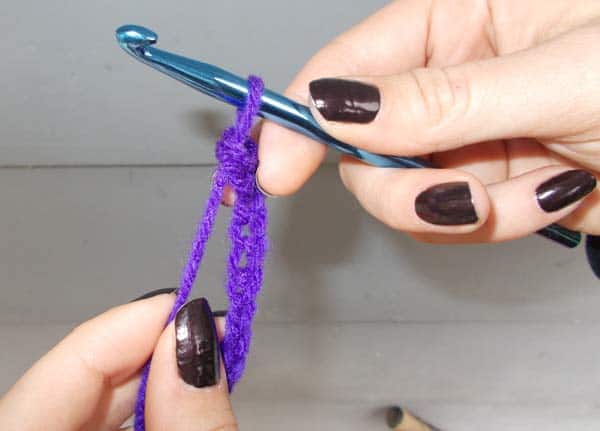
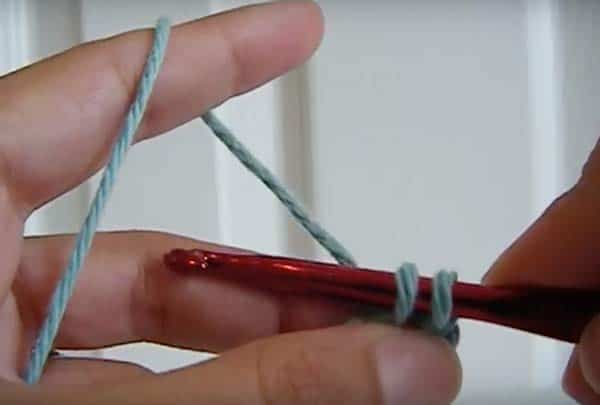
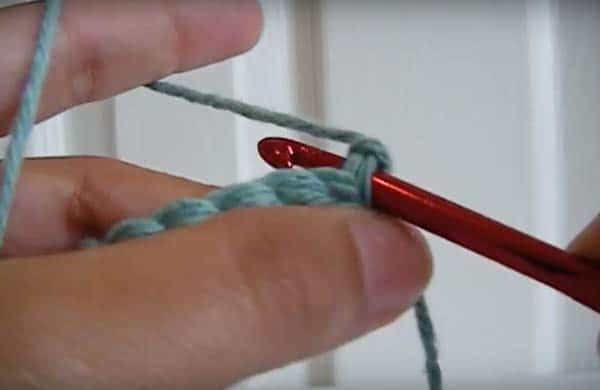
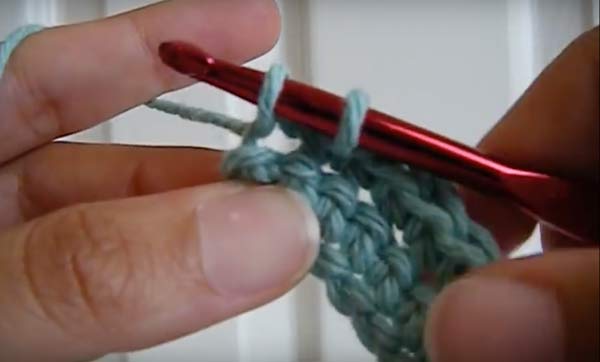
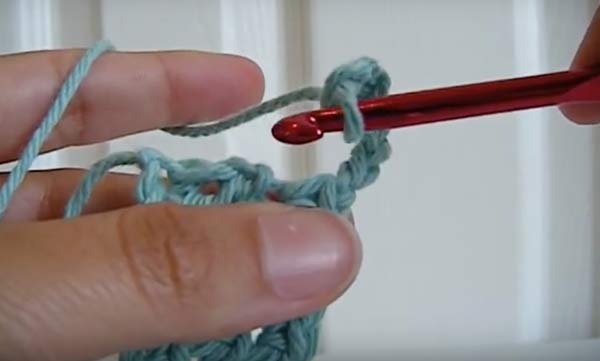
Creating a single chain is the next step. Holding the hook in the right hand, use your index finger to loop under the yarn to hold it away from the hook. Loop the yarn over the hook once
then pull through the slipknot

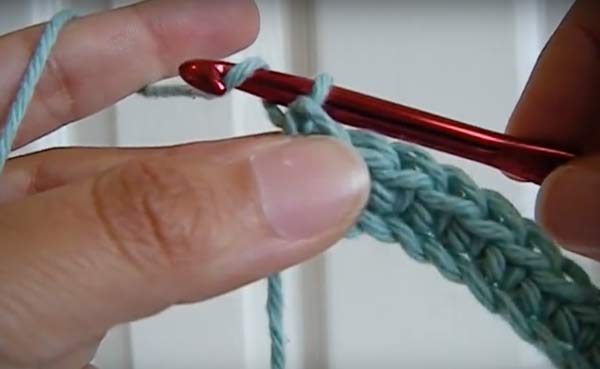
Repeat this single chain stitch until you reach the desired length. The chain should look like a series of loops connected to one another.
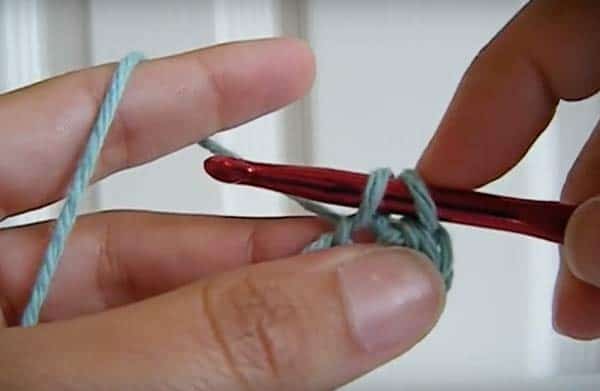
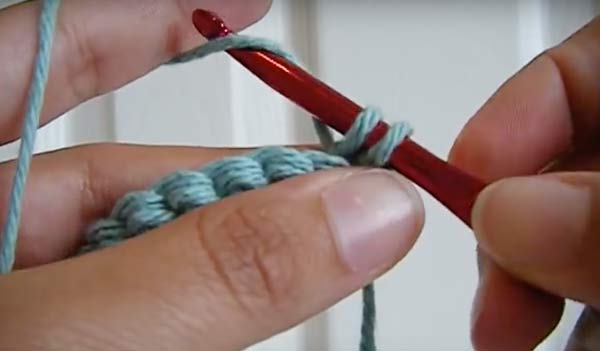
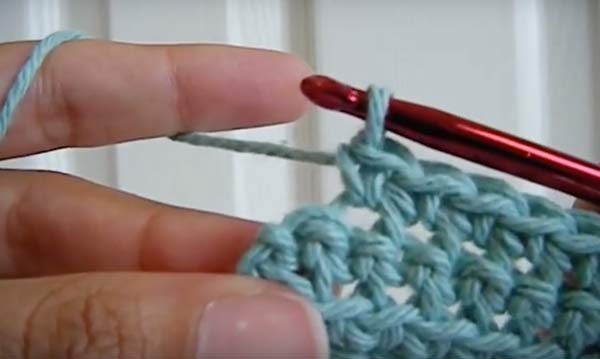
Once you complete the single stitch chain, you need to end the chain so you can move on to the second row. To do this, make two more loops at the end of the chain to give yourself a little room to change directions and return the way you just came. Now, you’ll backtrack. Skip over the last loop, and push the hook through the second to last loop. Now, there should be two loops on the hook.
Grab the yarn, and pull through both loops. That’s a double stitch which will serve as the “corner” of the pattern.
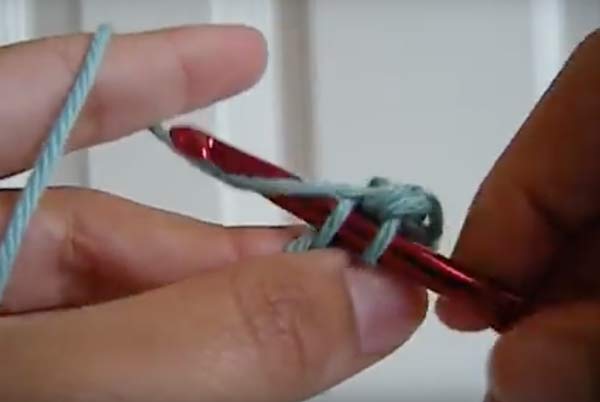
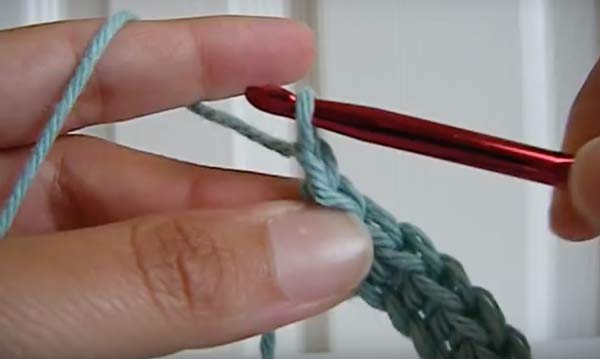
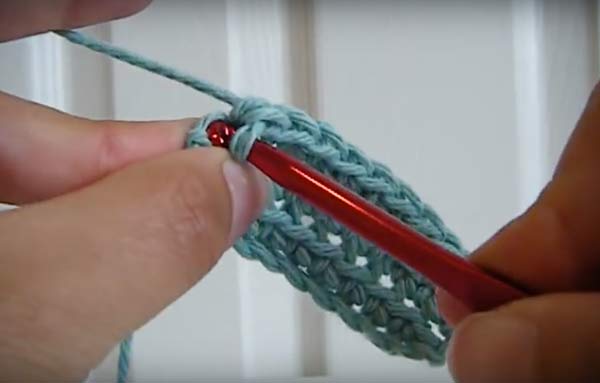
Go to the next loop, push the hook through the loop, grab some yarn, and pull through the first loop on the hook
With the two loops on the hook, grab more yarn, and pull through both loops. This is how you’ll proceed with double stitching.
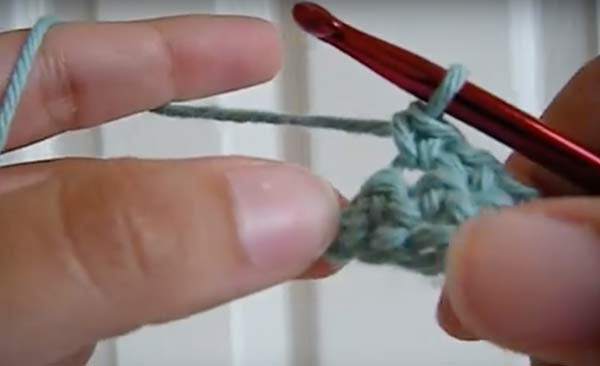
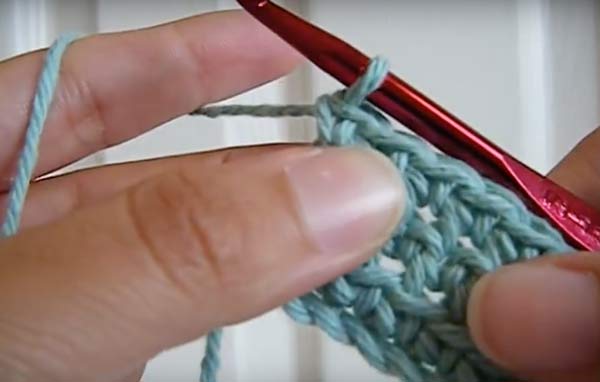
Now, you should have only one remaining loop on the hook. Move on to the next loop, push the hook through so that there are now two loops on the hook
and pull through the first loop on the hook. Once again, you should have two loops on the hook. Grab more yarn with the hook, and pull through both loops. So, you will be alternating between pulling through the first loop, then pulling through both loops, then pull through the first loop, and so on.
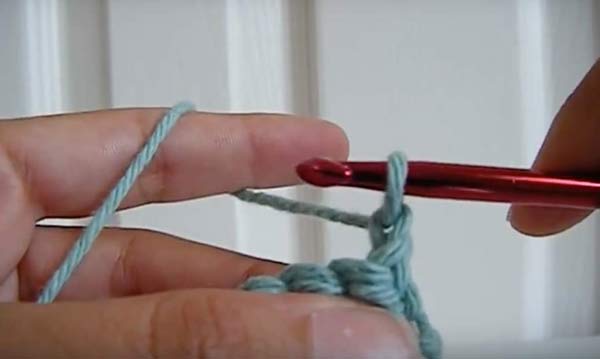
Keep moderate tension on the stitches without making them too tight. The hook should easily slide through the loops without slipping completely off. If the stitches are too loose, this makes the gaps between the stitches large. Tighter stitches makes the gaps smaller.
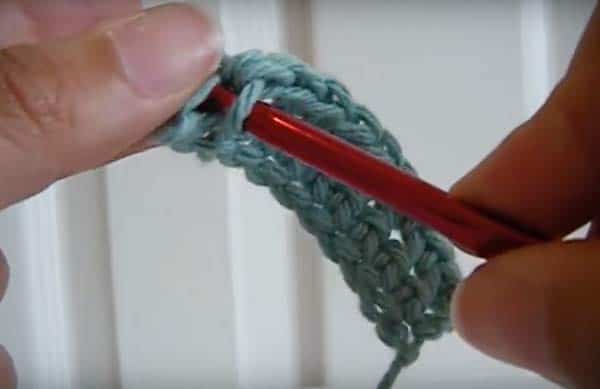
Once you’ve stitched to the end of the chain, you should be back to the original slipknot.
As you did with the others, make a double stitch. Pull the yarn through the double stitch as you’ve been doing. At this point you’ll need to add an extra stitch before making a turn in the other direction to start the next chain.
Loop the yarn one time, and pull through.
This creates a single looped space between the chains. This is what lets you make a corner square and change directions. With the hook still looped, move the completed chains to the left hand
With the completed chains in the left hand and a single loop on the hook, work towards the left and push the hook through the first loop stitch.
Push through, grab some yarn with the hook, and pull through to create a double stitch.
When you reach the end of the chain, you should be even with the end of the first chain. Notice there is a single loop at the end of the first chain you made
With one loop still on the hook, push through that single loop at the end of the previous chain
and pull through the first loop on the hook.
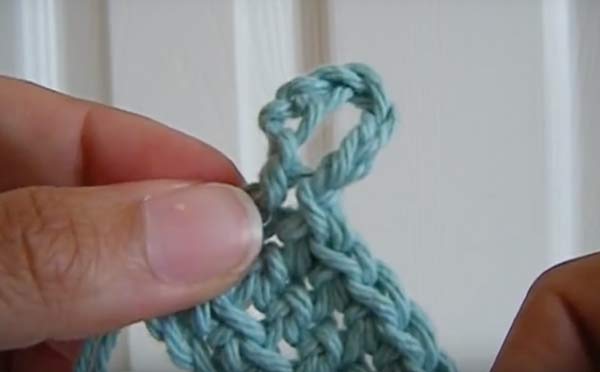
Now it’s become a double stitch. Grab more yarn with the hook, and pull through both loops. Grab more yarn with the hook to “chain up” that extra loop so you can change directions again as you did previously. Turn the completed chains so it’s back in your right hand again, and begin making another chain of double stitches. Repeating this will create a square shape.
To finish the square, you’ll need to tie it off. Complete the last double stitch, so you should have one loop on the hook.
Find the single extra stitch you made on the previous chain, and push the hook through it.
Now, there are two loops on the hook. Grab some yarn, and pull through the first loop. Grab some more yarn, and pull through both loops, leaving a single loop on the hook.
Loop under some yarn, pull back through the loop which creates another single stitch. Pull up a bit to create an elongated loop
Using your fingers, pull the loop which will tighten the knot. Snip off the excess, and you’re done. Weave the tiny excess yarn through the existing stitches to hide it. You can also use regular thread and needle to simply sew the excess yarn into a nearby loop. It will be almost unnoticeable.
A hanging loop can also be used instead of snipping it off. Just make a few single stitches,
and push the hook through any of the nearby loops in the chain. Grab some yarn, and pull back through to make a double stitch. With two loops on the hook now, pull the first loop back through the second loop on the hook. Make one more single stitch, and pull that final loop tight with your fingers. Then snip off the excess yarn. This makes a built-in loop to hang it up on the wall.
 Love to Crochet Ideas
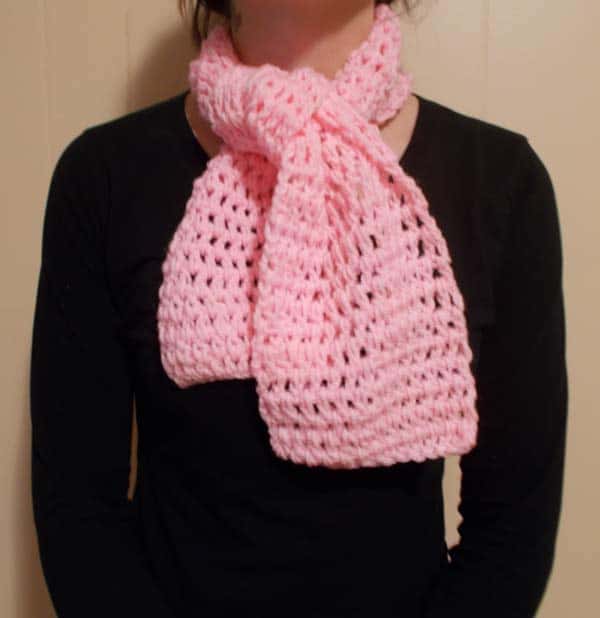
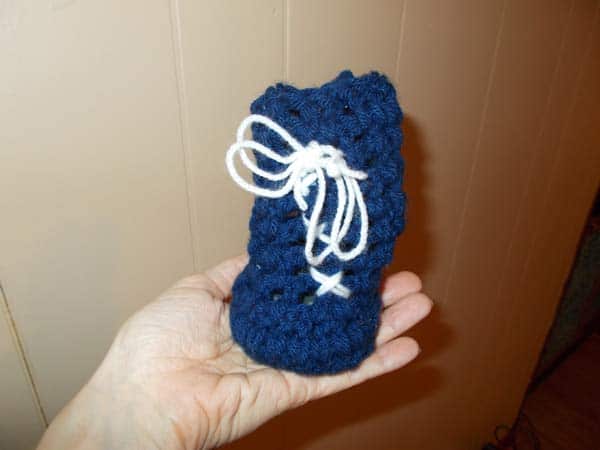
Crocheting lets you create all types of decorative or functional things, for instance, scarves, hats, baby blankets, dolls, purses, holiday decorations, and even curtains. If you’re willing to put in the time and effort required, you can even make an adult sized afghan.
Baby showers are perfect opportunities to crochet baby booties, blankets, hats, and bibs. They’re small, and once you get the hang of it, they can be completed rather quickly. Plus, they are beautiful when personalized with names and dates.
 Birthdays and wedding anniversaries call for something extra special, too. Purses for the birthday girl, and bedspreads or a personalized tapestry for the happy couple will become treasured gifts.
Patterns are not difficult to find online or in a store. Lots of websites offer free crochet patterns. You may be required to sign up for their newsletter first. They can be confusing, so you may want to start with patterns that have instructions geared towards beginners. Start off with something simple, like a book marker or a washcloth. Simple, repetitive stitches in a series of chains is what will stimulate muscle memory. Before you know it, you’ll be stitching faster with each project. You’ll be a pro in no time.
If you are looking for a crochet kit see my review on five highly rated crochet sets here…